Robotics
Robot Arm, Chess Computer Vision
The game of chess is one of the world’s most popular two-player board games. I often times find myself wanting to play even when no one is around to play. One solution to this problem is to play chess on a computer or mobile device against. However, many people would agree with me in thinking that playing a virtual game of chess is a completely different experience than playing a physical game of chess. For this reason, I intend to use this project as an opportunity to build a 6 degree of freedom robotic arm that will take the place of an opponent in a physical game of Chess. The state of the game will be determined by applying chess computer vision algorithms to images from a camera that will be mounted above the game board facing down.
The Setup
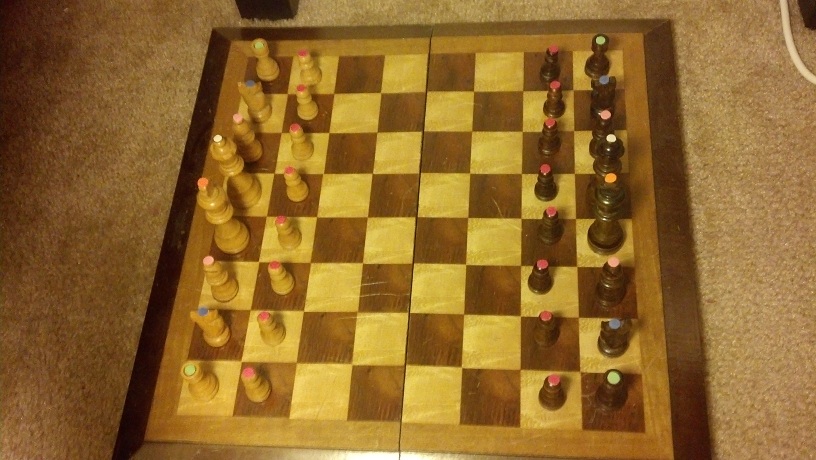
Chessboard
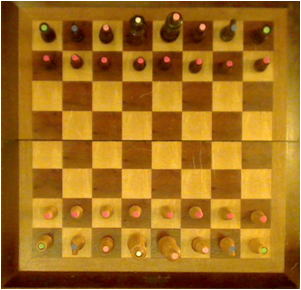
The chessboard used for this project is a standard wood chess board with 64 tiles, and 32 pieces.
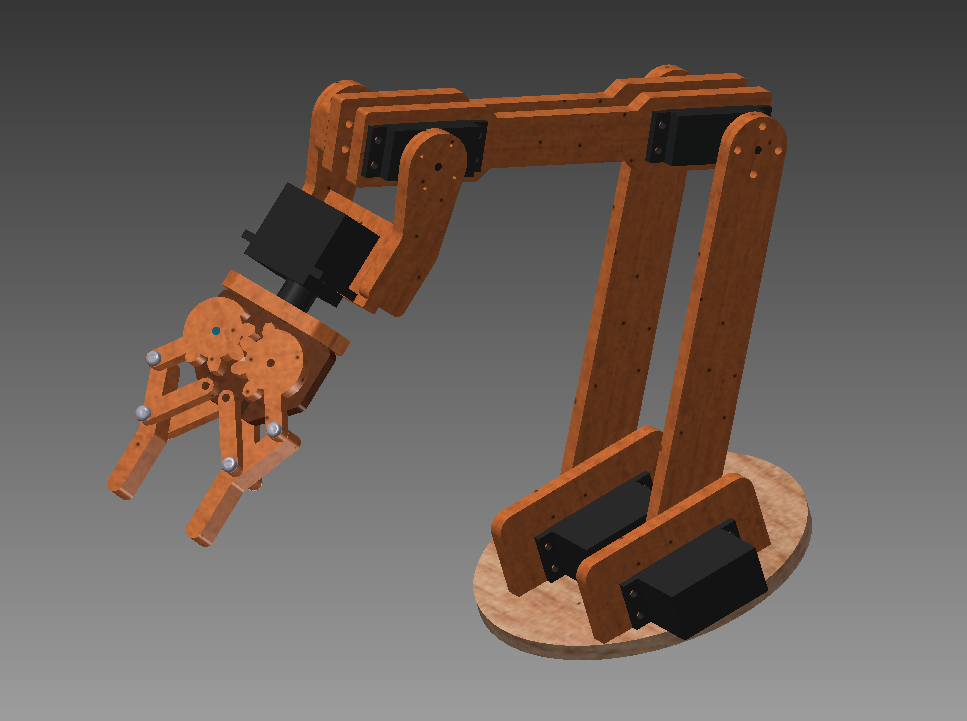
The Robot Arm
I designed a 3R spatial manipulator in Autodesk Inventor 2013 and constructed the arm out of medium density fiber board. The joints are controlled by 7 servos connected to an Arduino microcontroller. I wrote a simple program for the Arduino that processes incoming serial commands that tell it joint positions in degrees.
Arm Design in Inventor

Autodesk Inventor design of a 3R 6DOF robot arm manipulator

MDF Constructed 3R Robot Arm
Camera Calibration
I calibrated by personal webcam for this project. The MATLAB Camera Calibration Toolbox was used to determine the intrinsic calibration parameters of my camera. I was surprised to find that my camera has very little radial distortion.
Distortion Example
The web cam introduces very little radial distortion, as can be seen by the images below
|
Distorted Image from Webcam |
After Undistortion |
 |
 |
Chess Computer Vision
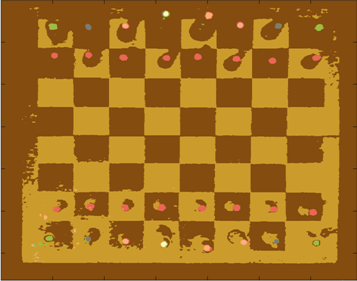
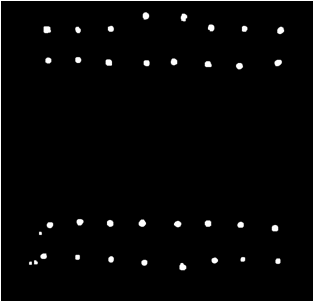
My low target for this project is to identify the chessboard. I have managed to detect a calibration chessboard, and a real chess board. I did a little math to find the centers of the tiles which will be my starting point for determining if a piece is occupying the tile. For detecting the board I made use of libcbdetect.
Examples of Detected Chessboards
In these examples, the chess board has been identified and the centers of the tiles have been marked.
|
Black and White Calibration Chess Board |
Real Chess Board |
 |
 |
Potential Problem – Height of Chess Pieces and Perspective
One problem I ran into is that the height of some the Chess pieces causes the colored markers to appear outside of the tiles that the piece is in. This is due to the camera’s perspective on the scene. I reduced the extent of this problem by increasing the camera’s distance from the board.
Finding the Pieces
In order to identify the pieces from the top-down perspective provided by the camera, I attached colored pieces of paper to the top of each chess piece. In chess, each of the two players begins with 16 pieces, spanning 6 different classes. I assigned each of the 6 classes a unique color and attached hole-punched pieces of paper to the tops of each piece. The color of the piece of paper is used to determine the class of piece, while the color of the piece is used to determine if the piece belongs to player 1 or player 2.
The pieces are mapped to colors as follows:
| Chess Piece | Color |
| Pawn | Red |
| Rook | Green |
| Knight | Blue |
| Bishop | Pink |
| Queen | White |
| King | Orange |
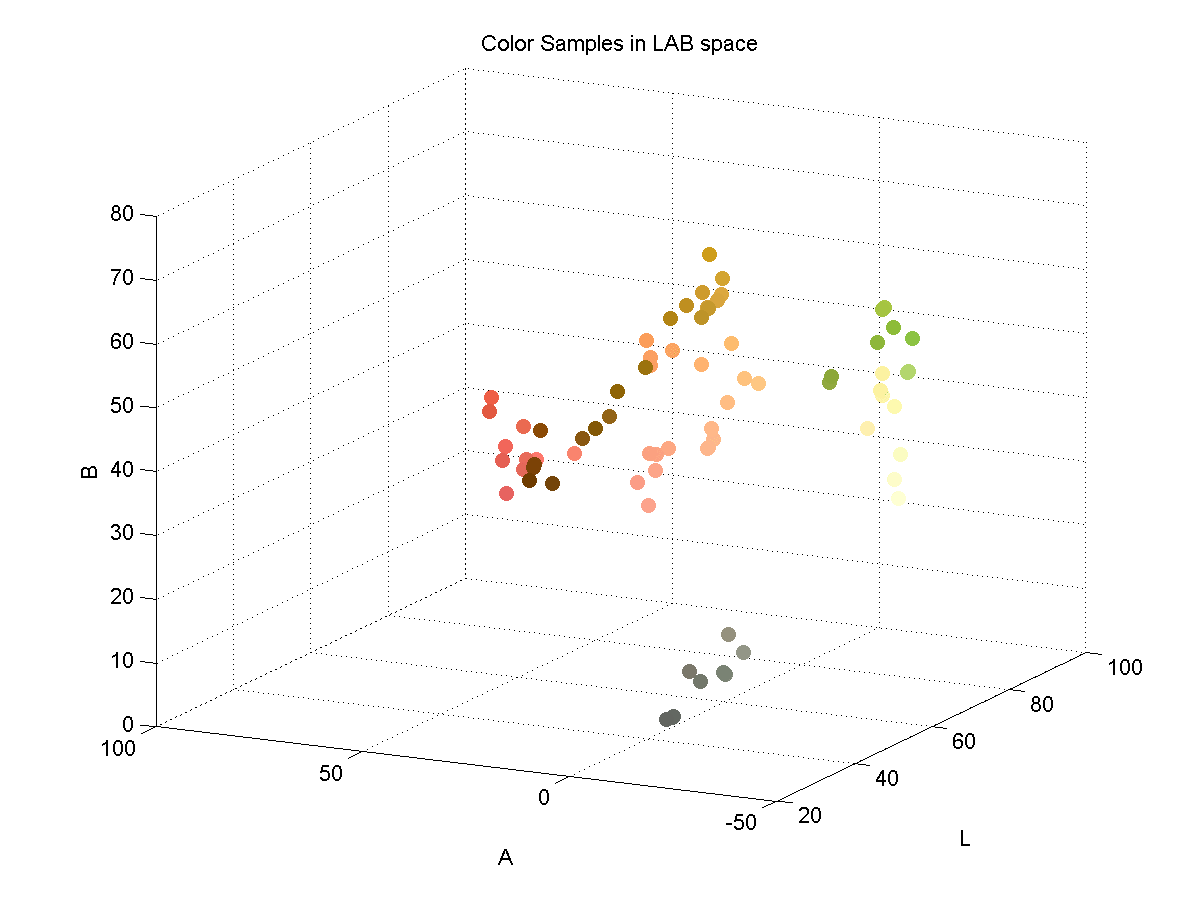
LAB Color Space
In order to effectively discriminate color, I had to find a color space that lent itself to this. I found that the LAB color space is common for color discrimination because it is more perceptually linear than other color spaces. To test its discriminative qualities for the purposes of this project, I took a few color samples of the potential colors for chess pieces and plotted them in LAB space. Here are three slices of the LAB space with varying L-values:

Here is a 3D plot of the color samples:
Color Identification
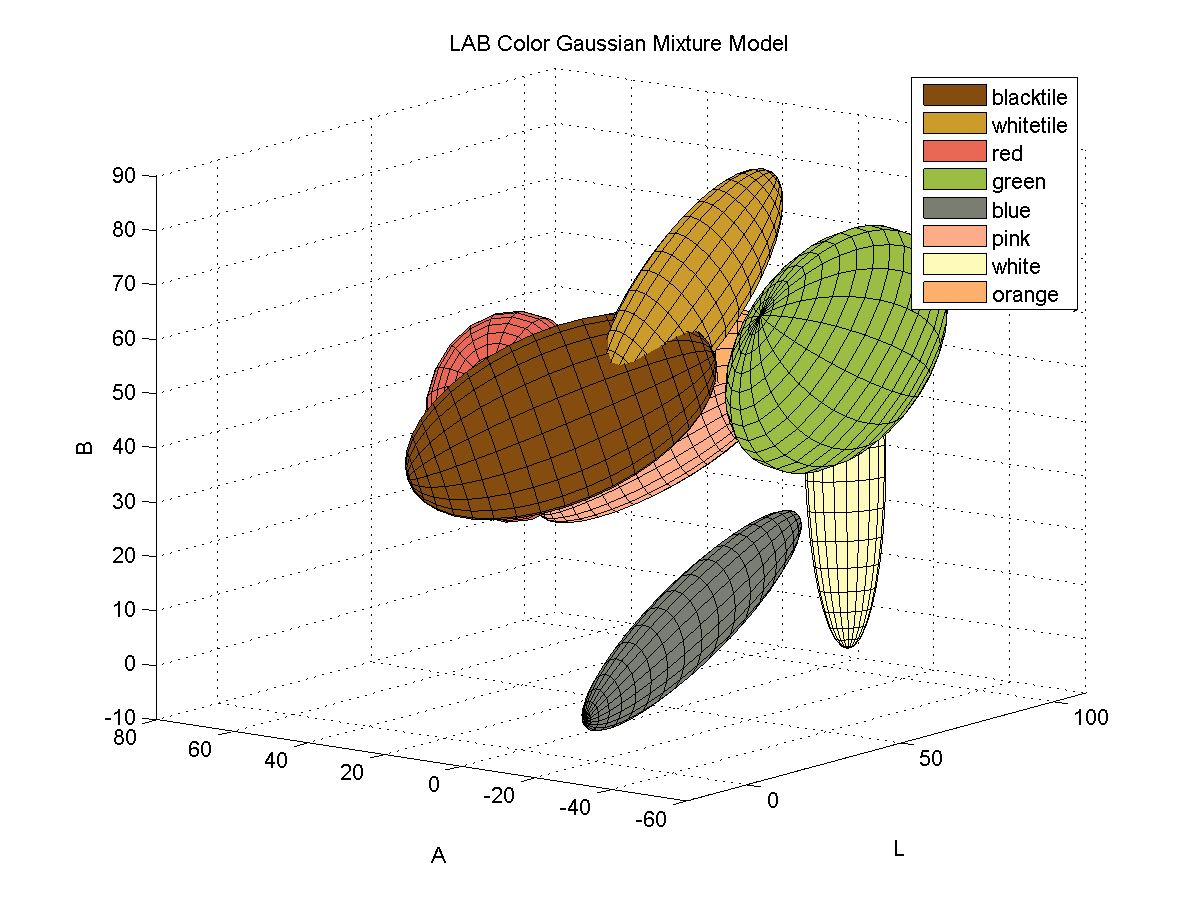
Color identification turned out to be quite a bit more difficult that I originally thought it would be. The variations in lighting caused a significant amount of variance in the detected colors. In order to capture the variance of the colors due to small variations in lighting I fitted color samples to Gaussian mixture models.
For each color, I collected samples of the color from images of the board with varying illumination and fitted the samples to a 3D Gaussian mixture model. Here is a depiction of the fitted Gaussians in LAB space. Each color is represented by a single Gaussian.
Segmenting Images by Color
In order to separate pieces from the board, I segmented the images based on pixel colors. To segment the image, I begin by converting an input image to the LAB color space. Then, for each pixel in the image, I compute the Mahalanobis distance from the pixel to each color’s Gaussian mixture model representation. I then find nearest Gaussian to the pixel and map the pixel to the color represented by said Gaussian.
Example Segmentation
| Input Image | Segmented Image |
 |
 |
From this point, I can easily isolate specific colors from the image.
Connected Component Blobs
Once the image is segmented, I calculate a binary mask that represents the locations of all of the chess pieces. I then perform morphological closing and opening to clean up the image and remove noisy color segmentation. Continuing with the output from the color segmentation above, here is the resulting binary mask of chess pieces:

This example contains perfect segmentation, but this isn’t always possible. For example, here is a noisy segmentation:
Usually noise results in blobs that are smaller than the actual chess pieces, so I remedied this problem by processing the blobs in order of decreasing size.
Identifying Pieces
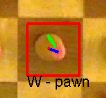
To determine the class of piece for each blob detection I pull the index of the color of the isolated blob from the segmented image. Once the class of piece is detected, I must detect which players piece it is; black or white. Determining if the piece is black or white is accomplished by analyzing color samples along a line from the centroid of the blob to the center of the chess board. I only collect samples that are right outside the edge of the color blob, because this is the location where black or white pixels are.
For example, here is a detected white pawn. The blue line represents the offset from the center of the detected blob to the tile center. The green line represents the locations where color samples were collected for determining if the piece is white or black.
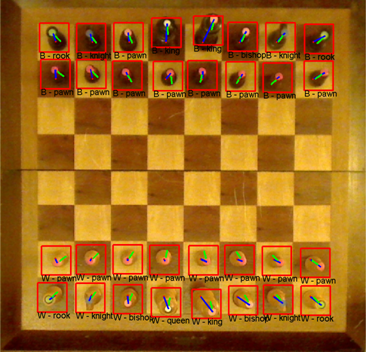
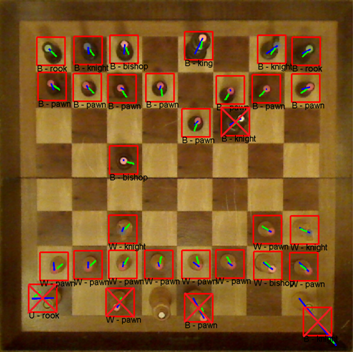
Here are examples of chess piece classification. From the images below, it is clear that variations in lighting cause problems for the classification process. I may be able to build a more robust model for representing the colors by using more color samples across a wider range of illuminations. It may be worthwhile to consider using Gaussian mixture models with more mixture components per color.
Correct Classification:
Incorrect Classification:
Problems
Here are some of the problems I ran into during this project.
- Variations in Lighting
- Possible Solutions:
- Use more diverse color samples for GMM’s
- Use multiple Gaussians per color
- Possible Solutions:
- Real-time
- Webcam auto adjustments (focus, lighting)
- Chess board & Pieces
- Glossy finish causes color misclassification
Robotic Arm 3R
I’m currently in the process of designing a robotic arm in Autodesk Inventor 2013. The design is based largely off of Google image searches for robotic arms. This is my first time using Inventor to create something that is actually useful. Here is a screenshot of my current progress.